Mississauga Tile Repair Pros
Work with professional Mississauga tile specialists who thoroughly assess substrates (analyzing flatness, deflection, moisture per ANSI/TCNA), determine proper primers, membranes (A118.10/A118.12), and mortars, and maintain EJ171 movement joints. You can expect laser-layout grids, calibrated rectified tile, correct trowel notch and ≥95% coverage, documented lippage within TCNA tolerances, and waterproofing photos. They can coordinate materials to usage (porcelain with DCOF ≥0.42, PEI 4-5), offer warranties connected to manufacturer systems, and keep clean, safe installation areas-afterward, discover how to verify performance with genuine project evidence.
Key Takeaways
- Professional installers comply with professional installation standards, ensuring correct surface prep, humidity testing, and movement joint installation to avoid system problems.
- Our local portfolio featuring before and after photos demonstrates perfect grout lines, controlled lippage, thorough waterproofing, and exact layouts across multiple Mississauga locations.
- Material requirements for every space: porcelain with DCOF ≥ 0.42, PEI 4-5 in kitchens, epoxy grout application in wet areas, and acoustic underlay materials where required.
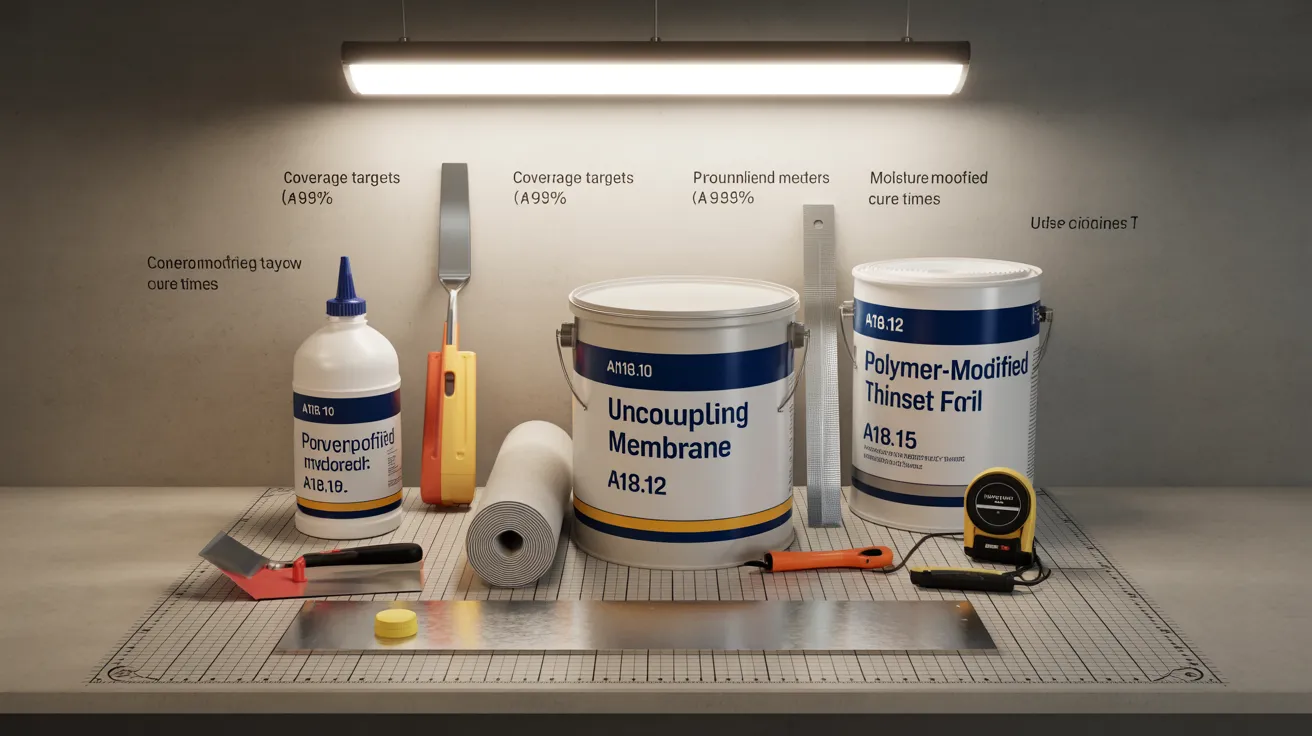
- Detailed documentation of systems includes primers, membranes (A118.10/A118.12), mortars, trowel specifications, including coverage rates and curing schedules connected to warranty specifications.
- Protected and tidy work environments: our comprehensive approach includes dust containment systems, complete surface coverage, detailed work schedules, and courteous interaction to keep your home fully functional during the installation phase.
Understanding the Value of Professional Tile Installation
Although DIY tutorials suggest tiling is easy, expert installation guarantees your tile project meets industry standards and performs as intended. You gain the advantage of thorough surface analysis, flatness adjustments, and moisture testing that prevents bonding issues. Experienced installers pick the appropriate primers, membranes, and mortars, then deliver correct trowel notch, coverage, and expansion joint positioning based on TCNA and ANSI standards. They utilize laser layouts to position grout joints and perfect sightlines, protecting design beauty.
You'll receive specified curing periods, expansion allowances, and deflection standards, which minimize installation defects. Installation teams verify slope requirements, edge clearances, and joint connections for reliable, regulation-meeting outcomes. They additionally offer guarantees connected to specified materials and manufacturer systems, safeguarding your project. In essence, exact procedures, verified methods, and reliable craftsmanship produce long-lasting, cleanable, and consistent finishes.
Selecting the Ideal Tile for Each Room
You'll need to match tile specs with room demands using specific performance criteria. For bathrooms, select moisture-proof products with minimal water absorption (not exceeding 0.5% porosity), slip resistance rated ≥ R10 or DCOF of 0.42 or greater; in food preparation spaces, prioritize durable porcelain (PEI rating 4-5) and stain-proof finishes. In bedroom spaces, select warm, quiet assemblies such as cork-backed porcelain or LVT solutions with sound-dampening underlayment achieving IIC/STC targets.
Humidity-Resistant Bathroom Selections
Due to bathrooms face persistent humidity and direct water contact, it's crucial to select tiles with low water absorption, certified slip resistance, and proven chemical durability. Select porcelain tiles with water absorption at ≤0.5% (following) ISO 10545-3 and conforming to COF/DCOF requirements (ANSI A326.3). For shower floors, utilize small-format mosaics to ensure grout traction and adequate slope conformity; for wall applications, install precision-cut porcelain or glazed ceramic tiles with vitreous bodies.
Integrate waterproof membranes per ANSI A118.10 beneath tile in moisture-prone areas, and apply epoxy grout (ANSI A118.3) for enhanced stain and moisture resistance. Treat junctions with moisture-resistant movement joints (TCNA EJ171). Ensure correctly sloped shower pans (¼ in. per foot) and fully keyed, polymer-modified thinset (ANSI A118.4/15). Improve moisture control with ventilated showerheads and a properly rated exhaust fan to achieve ACH targets.
Durable Kitchen Surfaces
Choose tiles that are resistant to high traffic, dropped cookware, oils, and thermal shock. In a busy kitchen, specify porcelain tile rated PEI 4-5 and ANSI A137.1 compliant. Opt for through-body porcelain for hiding chips and ≥0.42 DCOF for anti-slip properties. For work surfaces or islands near stone countertops, check heat resistance and thermal expansion compatibility; pick tiles with low water absorption (≤0.5%) and high Mohs hardness. Use rectified edges for narrow joints and epoxy grout for durability against stains and acids. For backsplashes, select glazed porcelain with Class A stain ratings. Confirm R11/R12 textures in prep zones, and install uncoupling membranes over plywood or concrete to minimize cracking. Treat natural stone only if used as accents, and specify color-body trims for professional terminations.
Peaceful, Serene Bedroom Flooring
While bedrooms require softness and tranquility, tile can deliver both when you specify the right installation. Pick porcelain or engineered stone with a low reflective finish (matte ≤10 GU) to decrease brightness and visual disturbance. Prioritize formats with rectified edges to minimize joints (2-3 mm) and decrease grout lines. For better sound control, install over a high-density underlayment (≥20 dB ΔLw) and decoupling membrane meeting ANSI A118.12 to minimize impact sound and control movement.
Select appropriate slip resistance for bare feet: DCOF ≥0.42 (wet) meets requirements. Use warmth-providing tiles with texture for comfort and warmth. Choose environmentally-friendly mortars and grouts conforming to ANSI A118 standards. Finish with elastic, color-coordinated grout and perimeter movement joints per EJ171 to avoid creaking and maintain a peaceful space.
Surface Prep and Moisture Control
Before you start laying any tiles, verify the subfloor adheres to moisture, soundness, and flatness specifications according to ANSI A108 and TCNA specifications. Assess deflection, confirming L/360 for ceramic and L/720 for stone. Perform surface leveling to reach the necessary plane: no more than 1/8 inch in 10 feet for large-format tile, as required by TCNA. Strip away contaminants; clear away any hollow or weak areas; repair with polymer-modified compounds appropriate for your adhesive.
Assess moisture emission levels through ASTM F2170 website or F1869. When measurements surpass specified thresholds, implement vapor barriers or vapor-retarding membranes as recommended. In moisture-prone zones, use ANSI A118.10 waterproof membrane; for crack mitigation, select ANSI A118.12 membranes. Respect movement joints per TCNA EJ171. Install suitable primers, sealants, and mortars across the installation.
Accurate Layout, Cutting, and Alignment
Establish layout lines and reference markers to ensure layout accuracy, then pre-lay to validate module, joint width, and pattern repeat. Snap perpendicular chalk lines, check squareness with laser templates or 3-4-5 method, and position the field to balance perimeter cuts. Use calibrated edge spacers to maintain uniform joints and adhere to ANSI A108 tolerances. Layout critical edges, undercuts, and transitions before laying adhesive. Make cuts with a snap cutter for ceramics, a wet saw with premium blade for porcelain and stone, and a core bit for penetrations; ease edges with a finishing pad.
Maintain surface alignment meets ISO 13007 specifications by checking surface levelness and adhesive application. Position from key sight points, apply mortar to tile backs when needed, and ensure pattern consistency between doorways and accent surfaces.
A Guide to Grout: Choosing, Sealing, and Maintenance
While tile establishes the visual surface, grout significantly impacts performance, hygiene, and longevity, making it necessary to align grout type with foot traffic, joint dimensions, and substrate movement according to ANSI A108/A118 and TCNA EJ171. Select sanded grout for joints ≥1/8", unsanded varieties for glass tiles or narrow joints, and polymer-modified cementitious products for moderate duty applications. For areas exposed to water, commercial kitchens, and stain-prone locations, use epoxy grout for superior impermeability, chemical protection, and color retention. Be sure to follow movement joints as specified in EJ171 to minimize crack formation.
After the grout has cured, apply a penetrating sealer to cementitious grout for protection against water and oil absorption; leave epoxy grout unsealed. Test for moisture emission to protect against efflorescence. Use pH-neutral cleaners for maintenance; refrain from using acids except when indicated. Conduct annual checks, spot-reseal high-traffic areas, and replace deteriorated joints promptly to preserve longevity.
Clear Pricing and Project Schedules
Since project scopes range from simple backsplash updates to complete mortar-bed reconstructions, we present comprehensive price breakdowns aligned with defined work scopes, material classifications, and TCNA/ANSI installation specifications, pairing it with a comprehensive work schedule and project roadmap. You receive detailed quotations with all inclusions, limitations, itemized rates, and allowances clearly specified. We structure project phases-demolition, surface prep, waterproofing, setting, grouting, cure time, and punch list-into organized scheduling, highlighting timeline flexibility, dependencies, and quality control points.
We arrange work phases to meet manufacturer cure times and TCNA movement-joint requirements, eliminating stress-related failures. Delivery schedules of tile, membranes, and trim are specified, with contingency paths for alternatives. We provide initial timeframes, completion checkpoints, and modification points. If specifications vary, we clearly adjust timelines and budgets, prior to continuation.
Tidy Workspaces and Respectful Service
Our dedication to schedule and cost certainty is evident in how we manage the site each day: we maintain OSHA-compliant housekeeping, use HEPA-filtered dust extraction at source, and isolate work zones with zipper barriers and negative air when required. We shield adjacent finishes with Ram Board, poly sheeting, and edge guards, and we organize materials to maximize workplace organization and movement. Regular sweep-and-vacuum routines clear debris; cables and hoses are organized with cable trays to avoid trip hazards.
We inform you regarding scheduling details, necessary utilities, and access requirements, ensuring clear communication at every stage. Our crews maintain safety standards using proper protective equipment, properly identifying damp areas, and posting caution notices as per WHMIS and location guidelines. We properly contain debris, seal containers thoroughly, and maintain consistent disposal, ensuring your space remains secure and operational.
Client Portfolio and Proven Reviews
Interested in our expertise in action in actual Mississauga properties? Review our project gallery to evaluate installation excellence, joint consistency, and substrate preparation. In our project galleries, you'll discover ANSI A108-compliant designs, precision tile sizing, lippage control within TCNA tolerances, and properly positioned expansion joints. We document adhesive choices, trowel notch size, coverage percentages, and expansion allowances for high-use and wet environments.
You can confirm results through client feedback associated with specific addresses, tile systems, and service scopes. We showcase before-and-after documentation, close-up photos of corner details, moisture barrier information, and cure times. Sort results by material selection (porcelain, stone, mosaic), pattern choice (herringbone, stack, offset), and setting (bath, kitchen, commercial). These verifiable examples help you assess precision, deadline performance, and proven outcomes on similar projects.
Maintenance, Care, and Lasting Performance
Maintain finish quality by following scheduled cleaning procedures that adhere to manufacturer pH guidelines and ASTM C1028/C1026 compatibility. Make sure to examine grout joints for minor fractures, eliminate biofilm, and renew penetrating or topical sealants following ANSI A118/A136.1 intervals. Document maintenance cycles and retain SDS for recommended cleaners to ensure long-term performance and warranty compliance.
Standard Cleaning Practices
Routine maintenance preserves tile appearance and lifespan by clearing away damaging debris, controlling moisture, and preventing chemical etching. Carry out weekly vacuum cleaning using a soft-bristle attachment or hard-floor setting to eliminate particles that can create micro-scratches. Follow up with microfiber cleaning using a neutral pH cleaner prepared following manufacturer guidelines; avoid using harsh or caustic products that harm glazes and finishes. Utilize a two-bucket approach to prevent soil transfer and replace the solution when clearly contaminated. Promptly clean spills to avoid staining and safety issues. For textured or matte tiles, employ a nylon scrub pad with minimal pressure to clear trapped dirt. Wash completely with clean water to eliminate detergent residue that collect dirt. Pat the surface with lint-free towels to minimize moisture accumulation and inhibit biofilm formation.
Grout and Sealant Care
With cleaning procedures, address sealant systems and grout joints, which primarily affect durability. Inspect the joints to identify hairline cracking, pinholes, and efflorescence; document locations and moisture conditions. Use pH‑neutral cleaners and a synthetic brush to eliminate biofilm without degrading polymer binders. Re‑seal porous grout per manufacturer intervals, ensuring ASTM C1368 water repellency. Opt for eco friendly sealants with minimal volatile organic compounds and verify EC1 or GREENGUARD certification.
Inspect and assess movement joints around edges and intersections; swap out deteriorated silicone with professional-grade ASTM C920 compounds. For addressing discoloration, use oxygen-based cleaners; steer clear of acids on cement grout compounds. Apply these color matching techniques: create color tests with project-specific illumination and confirm against samples in wet and dry states. Control humidity environment to optimize cure and adhesion.
Frequently Asked Questions
Can I Get Eco-Friendly or Low-VOC Adhesives and Grouts?
Absolutely. You can select low VOC adhesives and recycled content grout that meet strict environmental standards. We specify polymer-modified, water-based formulations with VOC content under 50 g/L, and grout selections containing post-consumer recycled aggregates. You'll receive SDS and VOC certificates for all materials. Furthermore, we adhere to ANSI A118 performance standards, perform mockups, confirm cure times, and guarantee proper ventilation to minimize emissions during application and habitation.
Do You Offer Locally Manufactured or Canadian Tiles Upon Request?
Absolutely, we offer tiles from Canadian and local sources. Coincidentally, your timeline aligns perfectly with our sourcing cycles, so we'll coordinate with local producers and Canadian craftsmen, confirm origin, and confirm CSA/ISO-compliant production. We'll gather manufacturing data, DCOF measurements (DCOF), VOC declarations, and cold weather performance where applicable. You'll receive product documentation, samples, and delivery projections. We handle logistics, confirm accuracy for rectified edges, and match grout-joint tolerances to TCNA/ANSI installation standards.
What Warranties Cover Materials and Workmanship?
You're covered by a Manufacturing guarantee on tiling materials and adhesives per product specifications, and a formal Labor warranty on installation. We'll provide documented terms specifying duration (usually 10-25 years for materials; 2-5 years for labor), scope, and exclusions. Protection covers tile defects, adhesion problems, and workmanship per ANSI A108/A118 and TCNA guidelines. We record all products, provide proof of compliance, and resolve problems through replacement or repair subject to site conditions and maintenance.
What's Your Process for Handling Unforeseen Building Problems Uncovered During Construction?
We pause work, document our findings, and update you on the scope, building code requirements, and cost implications. When concealed issues arise, we perform required detailed examinations. We provide a comprehensive change order document detailing remedial work, material requirements, and adjusted timeframes. We collaborate with structural experts for structural integrity concerns, maintain adherence to Ontario Building Code, and arrange necessary inspections. You receive daily progress updates, complete with visual documentation and sign-offs. Construction resumes following authorization, maintaining structural safety and warranty validity.
Do You Work With Plumbers and Electricians for Integrated Renovations?
We seamlessly manage plumbing and electrical coordination with precision. Our method integrates detailed coordination and proactive communication to eliminate interference. You'll receive a detailed plan, certified plans, and code-compliant sequencing. Our team conducts pre-construction assessments, establish utility locations, confirm power calculations, and lock in component details. We manage schedule forecasts, utility interruptions, and inspection scheduling to align with regulatory requirements. You approve key phases, and we track every change. This integrated management ensures minimal disruption, preserves coverage, and achieves reliable outcomes.
Summary
You step onto a flawlessly leveled floor-tiles positioned with precision, with consistent grout lines, corners sharp. Moisture protection secures wet zones, sealants guarantee durability, and movement joints eliminate stress cracks. Transparent estimates, organized workflow, and punctual deliverables keep the project controlled. You see a portfolio of local installs and confirmed feedback validating professional craftsmanship. With appropriate maintenance practices-balanced pH cleaners, regular sealer maintenance-you preserve finish durability and performance, ensuring your Mississauga spaces stay durable, elegant, and exact.